Yun & Compatible
- Details
- Written by Sonny Yu
Install bash:
opkg update
opkg install bash
nano /www/cgi-bin/test.sh
#!/bin/bash
echo "Content-type: text/html"
echo
echo "<html><head><title>hello world</title></head><body><p>It works!</p></body>"
exit 0
chmod 755 /www/cgi-bin/test.sh
View result at "http://192.168.0.102/cgi-bin/test.sh"
It works!
Write comment (0 Comments)
- Details
- Written by Sonny Yu
Install Software:
opkg update
opkg install fswebcam
fswebcam --help
Usage: fswebcam [<options>] <filename> [[<options>] <filename> ... ]
 Options:
 -?, --help                   Display this help page and exit.
 -c, --config <filename>      Load configuration from file.
 -q, --quiet                  Hides all messages except for errors.
 -v, --verbose                Displays extra messages while capturing
     --version                Displays the version and exits.
 -l, --loop <seconds>         Run in loop mode.
 -b, --background             Run in the background.
 -o, --output <filename>      Output the log to a file.
 -d, --device <name>          Sets the source to use.
 -i, --input <number/name>    Selects the input to use.
 -t, --tuner <number>         Selects the tuner to use.
 -f, --frequency <number>     Selects the frequency use.
 -p, --palette <name>         Selects the palette format to use.
 -D, --delay <number>         Sets the pre-capture delay time. (seconds)
 -r, --resolution <size>      Sets the capture resolution.
     --fps <framerate>        Sets the capture frame rate.
 -F, --frames <number>        Sets the number of frames to capture.
 -S, --skip <number>          Sets the number of frames to skip.
     --dumpframe <filename>   Dump a raw frame frame to file.
 -s, --set <name>=<value>     Sets a control value.
     --revert                 Restores original captured image.
     --flip <direction>       Flips the image. (h, v)
     --crop <size>[,<offset>] Crop a part of the image.
     --scale <size>           Scales the image.
     --rotate <angle>         Rotates the image in right angles.
     --deinterlace            Reduces interlace artifacts.
     --invert                 Inverts the images colours.
     --greyscale              Removes colour from the image.
     --swapchannels <c1c2>    Swap channels c1 and c2.
     --no-banner              Hides the banner.
     --top-banner             Puts the banner at the top.
     --bottom-banner          Puts the banner at the bottom. (Default)
     --banner-colour <colour> Sets the banner colour. (#AARRGGBB)
     --line-colour <colour>   Sets the banner line colour.
     --text-colour <colour>   Sets the text colour.
     --font <[name][:size]>   Sets the font and/or size.
     --no-shadow              Disables the text shadow.
     --shadow                 Enables the text shadow.
     --title <text>           Sets the main title. (top left)
     --no-title               Clears the main title.
     --subtitle <text>        Sets the sub-title. (bottom left)
     --no-subtitle            Clears the sub-title.
     --timestamp <format>     Sets the timestamp format. (top right)
     --no-timestamp           Clears the timestamp.
     --gmt                    Use GMT instead of local timezone.
     --info <text>            Sets the info text. (bottom right)
     --no-info                Clears the info text.
     --underlay <PNG image>   Sets the underlay image.
     --no-underlay            Clears the underlay.
     --overlay <PNG image>    Sets the overlay image.
     --no-overlay             Clears the overlay.
     --jpeg <factor>          Outputs a JPEG image. (-1, 0 - 95)
     --png <factor>           Outputs a PNG image. (-1, 0 - 10)
     --save <filename>        Save image to file.
     --exec <command>         Execute a command and wait for it to complete.
Save image from video stream:
fswebcam -i 0 -d v4l2:/dev/video0 --jpeg 95 --save test.jpg -S 20 -r 640x480
Save image at test.jpg, skip the first (group) frames with the -S 20.
Replace "test.jpg" with `date +"%G%m%d%H%M%S"`.jpg
It create 20140515123538.png and has 2024/05/15 12:35:38 as time stamp.
Write comment (1 Comment)
- Details
- Written by Sonny Yu
Arduino Yun Bridge example from IDE.
ab - Apache HTTP server benchmarking tool
http://httpd.apache.org/docs/2.2/programs/ab.html
ab -n 20 -c 1 http://192.168.0.186/arduino/analog/2/123
Concurrency Level:      1
Time taken for tests:   3.425 seconds
Complete requests:      20
Failed requests:        0
Write errors:           0
Non-2xx responses:      20
Total transferred:      2100 bytes
HTML transferred:       0 bytes
Requests per second:    5.84 [#/sec] (mean)
Time per request:       171.275 [ms] (mean)
Time per request:       171.275 [ms] (mean, across all concurrent requests)
Transfer rate:          0.60 [Kbytes/sec] received
Connection Times (ms)
             min  mean[+/-sd] median   max
Connect:        0    0   0.0      0       0
Processing:   164  171   7.9    169     192
Waiting:      153  159   6.2    156     171
Total:        164  171   7.9    169     192
171.275 [ms] (0.17 s) is average speed of bridge speed, and should meet average application's requirement.
Write comment (0 Comments)- Details
- Written by Sonny Yu
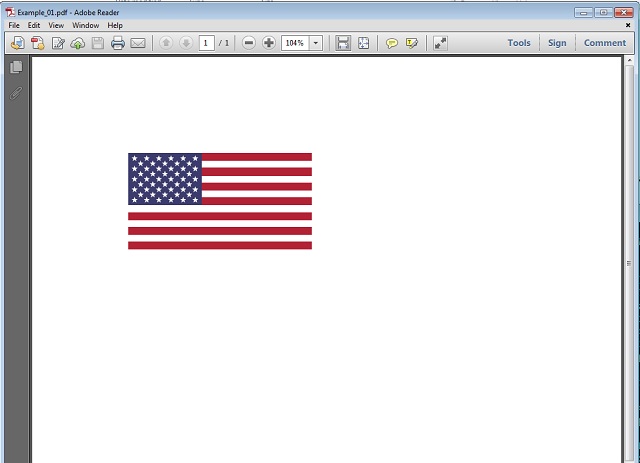
Create PDF file of US flag:

http://pdfjet.com/net/examples/example-01.html
Compile Example_01.java file into Example_01.class at Linux box (copy PDFjet.jar into same directory)
javac -classpath .:PDFjet.jar Example_01.java
Test it at same box:
java -classpath .:PDFjet.jar Example_01
Copy Example_01.class file into Openwrt:
jamvm -classpath .:PDFjet.jar Example_01
Example_01.pdf is here:
https://www.dropbox.com/s/ilcxfz9i90z3j54/Example_01.pdf?dl=0
Write comment (0 Comments)Subcategories
Expand the Storage at Yun
Expand the Storage at Yun
Languages Supported by Yun
Languages Supported by Yun
Backup and Recover
Backup and Recover
Network and Yun
Network and Yun
Hardware & Yun
Hardware & Yun
OpenWrt-SDK & Yun
OpenWrt-SDK & Yun
Page 4 of 34

